Saturday, June 15, 2013

Recipe Box Redo

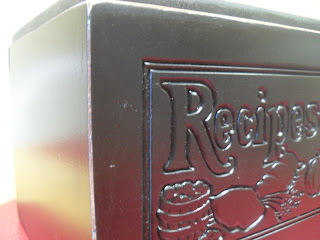
Today I went to Goodwill and found this little box on the back corner of a shelf.


I immediately snatched it up because I'd never seen anything like it.  After studying it for a couple of minutes, I decided it definitely had some potential, so I purchased it for $2.99. 


After sanding, priming, painting, and distressing it, I'm in love with the final result...


Isn't it great?


I lightly sanded the finish with a block sander to "rough it up" and used Krylon primer and black satin spray paint.


My husband distressed the corners by lightly sanding them when the paint was completely dry.


Plenty of room in there for yummy recipes :)  One last before and after shot.....


post signature

Friday, May 10, 2013

Special Dates Sign

In the last couple of weeks, our tiny apartment has seen quite a bit of reformation! Let me just say--hallelujah the paneling is gone!  But more to come on that later.

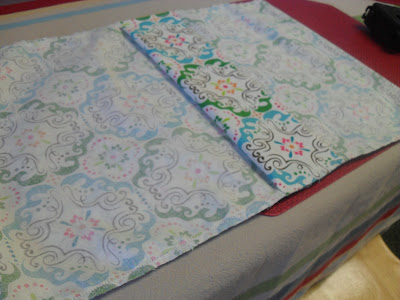
As a result of the changes and the Spring cleaning I tackled, I've felt inspired to finally decorate my living room incorporating colors and ideas that I've been thinking about for quite awhile now.  You've already seen the pillows I made for my couch.  I also bought some new curtains (pictures soon!).  However, there was the issue of this big blank wall behind our couch and what to put there!

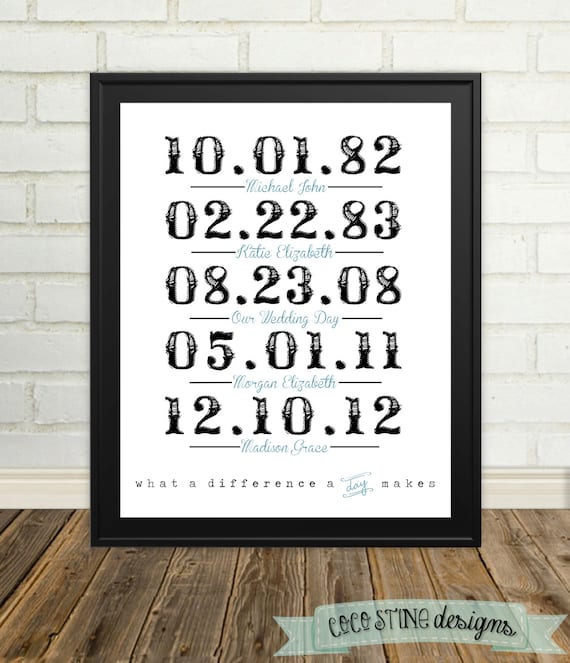
For awhile now, I've been loving date signs such as these:


Now, I've already chosen what I want to hang on this big, blank wall--and I thought a sign like this would definitely compliment the look.  But let me show you what I've chosen:

Isn't this bronze/brown letter R sweet?  I loved it as soon as I saw it at Hobby Lobby.  Thanks to a 40% off coupon, I was able to get it for $4.99!


Secondly, I ordered a photo canvas to hang alongside the R.  Can I just say I'm in love with photo canvases and have dreamed of getting one for a long time? I had some walmart gift cards saved from Christmas time, holding out for the perfect thing to spend them on.  When we got our wedding photos, I priced canvases and found out I can get this 16x20 size for only $4 out of pocket (after giftcards).  Um, yes please! 

So anyways, back to the dates.  Don't you think it will look good hanging with the R and the Canvas above my couch? I thought so too.  

I played around on picmonkey (my new favorite site) and came up with this:

I'm so pleased with the design.  Although, I must say I had to print it three different times.  Ahem..first I got Devin's birthday and our engagement dates wrong.  The second time, I got our wedding date wrong.  Yeah...  But anyways, the third time's a charm, right?

To keep everything symmetrical, I wanted to fit this into a 5x7 frame.  I know its a little on the small side, but I didn't want it overpowering anything else.  Here's what it looks like after I popped it in the frame:


What do you think?  I'm picking up my canvas this afternoon so stay tuned for the finished look!
post signature

Thursday, May 9, 2013

Tea, Honey, & The Beaver

Being sick is no fun! I woke up today with a scratchy throat, headache, and slight fever.  This noon I decided to call it quits at my office and came back home to work from my couch (don't be jealous).  These three items became my best friends for the remainder of the afternoon until I fell asleep and took an hour long nap...


Pretty lousy afternoon--except for Leave it to Beaver :)  Thankfully I'm feeling much better.  I suppose that means I should get up and do something now!

post signature

Wednesday, May 8, 2013

My Top Ten Favorite Things About Spring


Let's be honest...

Spring is one of the best seasons out there! There is something so refreshing about all the greenness and new life after a long, cold winter.  Especially when you think about having the whole summer still stretching before you.  Love!

Here are my top 10 favorite things about Spring in no particular order:

1. Birds singing

2. Bright green baby leaves

3. Flowering trees--probably my all time favorite thing

4. Thunderstorms

5. Taking walks on warm evenings

6. Tulips

7. Open windows (before it gets too hot and the AC goes in!)

8. End of all things school

9. Sitting in the sun

10. Longer days

What are some of your favorite things about Spring?
post signature

Friday, April 26, 2013

DIY Decorative Pillows--on the cheap!


Materials Needed:

1 standard bed pillow ($2.50 at Walmart)
Fabric (45x13 inches for one pillow)
Sewing machine

Start by cutting your standard bed pillow in half.  Look at all the batting in there!  I love thinking outside the box for materials.


Next, sew the open end of the pillow shut.  You'll need to stuff and squish the batting into the lining to do this.  Take your time and be sure to hold it shut with pins before you begin to sew.


 Now you have two nice little pillows!

On to the fabric cover.  If you are using a half of a standard pillow like I did, cut a fabric rectangle that is 13x45 inches long.  Fold each short end over twice and sew to create a 1/2 inch hem.  This finished end will be visible when the pillow case is finished.


Take the hemmed ends of the pillowcase and bring them together to overlap over each other in the middle.  Be sure that right sides are together.  It should measure 19 inches from end to end.  If it does not, adjust it until it does.  Also, be sure the hemmed ends are overlapping at least 2-3 inches.


Pin the unfinished edges together and sew.  DO NOT SEW the hemmed, overlapped edges together.  This is how you will get your pillow in and out of the case.


Turn the pillow case inside out and iron flat.


Insert the pillow into the case through the opening in the back...and tada!  You have a pillow with a handy removable case for easy washing.


The total cost for one of these pillows was about $3.50 if you include the fabric.  Compare this price to the following throw pillows I found at Target:


That's a whole lot of savings for pretty much the same results :).  I'm also planning on making some larger square pillows to go with these smaller ones on the couch.  

That's all for today! And now I'm off to enjoy my new pillows on the couch...

Tuesday, April 16, 2013

Smoothie, Anyone?


Aaah! I love when Spring & Summer roll around and fruits and veggies are plentiful and lower priced.  During this time of year, I am trying to allocate about 30% of our grocery budget to buying fresh fruits and veggies.

One of our favorite things to use fruit for are smoothies.  Super refreshing and full of healthy vitamins! I've tried several different methods and recipes for making smoothies, and I've finally settled on a method that works well for me.

The first step is to get your hands on fresh fruit.  Keep an eye out for sales and stock up when you can.  For example, this week blackberries were on sale for 99 cents at Aldi.  Since the normal price is around $3.00, I obviously stocked up!

Sometimes, if I'm not able to get decently priced fruit, I'll also check the frozen fruit selection.  A lot of times you can get your hands on reasonably priced frozen strawberries and raspberries.  However, my experience has been that it is usually cheaper to buy them fresh when they are on sale and freeze them yourself.

After rinsing the fruit and slicing the strawberries, I package them in freezer bags.  Normally, I'll divide each of the strawberries packages into two separate bags.  If you use freezer bags to store your fruit, make sure to remove as much air as you can to prevent freezer burning.


Now, whenever we feel like having a smoothie, I have my fruit all prepped!

To make a smoothie for two, I grab one of my fruit bags straight from the freezer and pop it into out awesome ninja blender.

Next, I blend the fruit by itself for a few seconds to break it down.


I add a couple tablespoons of sugar to the fruit, but any sweetener or honey would work as well.  Finally, add about 2 cups of milk and blend...


If the smoothie is too thick, add more milk until it's the consistency that you like.

And that's all! Serve and enjoy...


It's like drinking ice cream! What kind of smoothies do you like?

Wednesday, March 27, 2013

Successful Attempt at Homemade Chicken Ravioli!

Ravioli is so yummy! Because of the strong Italian influence in Argentina, I grew up eating it quite a bit.  But this man is the one who inspired me to try my hand at making it myself:


Chef Gordon Ramsay!!

Devin and I have been watching through all the seasons of Hell's Kitchen on Hulu.  A couple of days ago, we watched an episode where the chefs were challenged to create unique ravioli.  They seriously looked so good that I decided to try making some with whatever I had on hand--chicken of course :).

Here is my version of Homemade Chicken Ravioli...


Filling

2 chicken breasts
2 garlic cloves, minced
1 tsp basil
1 tsp parsley
salt & pepper to taste
2 Tbsp bread crumbs
2 Tbsp parmesan
1 Tbsp olive oil
1/4 c cream or milk

Dice the chicken and saute over medium heat in some olive or vegetable oil with the garlic.Once the chicken is cooked, season with basil, parsley, salt, & pepper.  Remove from heat and add bread crumbs, parmesan, olive oil, and cream.  Place chicken mixture in a food processor and grind it all up.  Chill filling in the refrigerator until ready to use.


Pasta Dough

2 c flour
1 egg
1/2 c milk
1 tsp salt

Mix together ingredients until combined.  You may need to add a couple additional drops of milk if it is too dry.  However, the dough shouldn't be sticky at all.  Turn onto floured surface and knead a few times until dough is smooth.  Divide dough in half.  Wrap one half in plastic wrap to keep it from drying out.  Roll out the other half as thin as you can (about 1/8 inch).  Using a cup or some other round object, cut dough into disks.  Repeat with other half of dough.  Collect dough scraps and continue to roll out and cut until you have used it all.


Assembly

Place a spoonful of filling in the middle of one of the dough circles.  Top with another dough circle and pinch edges shut.  Moisten the edges with a little water if they aren't sticking.  Place finished ravioli on generously floured tray.  Cover and refrigerate until ready to cook.


Cooking

Boil a large pot of water.  Just before putting ravioli in, drizzle some olive oil in the water.  Drop ravioli into water and gently move pot back and forth a couple of times so that they don't stick together.  I only cooked 6 or 7 at a time.  Boil for 2-3 minutes then remove with a slotted spoon into a gently oiled dish.  Serve with your favorite tomato pasta sauce or creamy white sauce.


There are several steps involved in making these...but trust me, they are so worth it!!

Enjoy!